How to Add a Layer to the Table of Contents
When you have a new Map Layer available you can add it to your Table of Contents.
Step-by-step guide
- If you know the details of the layer you want to add to your Table of Contents then open the
toc.xmland edit this file. If you are familiar with the layer you want to display, you can use the other layers defined in this file as a guide and add in as manyentryXML Tag lines that you need.
If you're not sure what layers are available in the Map Engine you can use the Weave Administration Tool Console or Weave's OSGi console to assist you (using the Console will save you some typing and reduces the likelihood of a typing mistake). In the console, run the
memdcommand with the details of the Map Engine you want to report on. If you're not sure of the Map Engine name, either refer to themapengine.xmlfile or use the Map Engine Tool from the Administration Tool.memd toc <mapengine_name> e.g.: memd toc mapengine.main
The
memdcommand will generate XML that will be used in thetoc.xmlfile. Depending on your logging properties, the results from this command will either be reported in the Console (where you can simply copy and paste the text) or in theC:\weave\logs\weave.logfile (go to the bottom of the file and copy the section after the line “MapEngine ToC Configuration Generator”).
Add the XML generated from the step above to the
toc.xmlfile. The layers are assigned their XML Attributeidwith the prefix of “l_” followed by the Map Engine name, followed by the name of the layer in the Map Engine. Use this same naming convention for any further layers added. Change thecheckedXML Attribute totrueif you want the layer to be displayed by default when Weave starts.<toc:model id='toc.main'> <mapengine>mapengine.main</mapengine> <entry id='l_mapengine.main_waste' layer='waste' label='Waste Collection Areas' checked='false'/> <entry id='l_mapengine.main_property' layer='property' label='Property' checked='false'/> ... <entry id='l_mapengine.main_counres' layer='counres' label='Council Reserves' checked='false'/> </toc:model>
Note: As you add more layers, ensure that every ToC entry has an id (whether the entry is a group, folder or layer). The id should be unique across the whole ToC model. This also applies if you’re using the same layer multiple times in a ToC model, i.e. maybe you have layers in groups and for ease of use you’ve put the same layer in multiple groups.If the layer that you want to add to Weave is not reported as being part of the Map Engine then:
If you are the author of the mapping data then add the layer to one of your existing Map Engines.
Or contact the author of the mapping data and get them to add the spatial layer.
Changes to a Map Engine used by Weave will be automatically picked up by Weave.
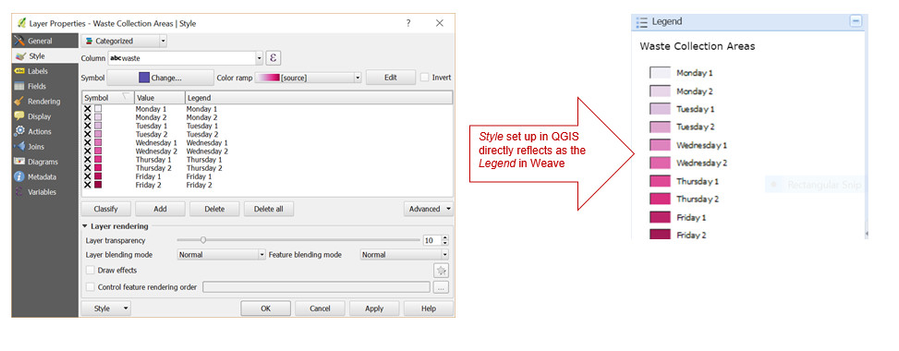
- The legend as displayed in the Legend panel in Weave is controlled by the Map Engine. If you want to change the ordering of items in the legend or naming of the legend items, etc., this needs to done in the system that is producing the map (e.g. ArcMap, QGIS, GeoServer). There is no Weave configuration that will change the appearance of the legend.
Also refer to the following sections of the Weave System Administrator Guides:
Related articles