Integrating with AssetMaster
- Shaun Forbes
- Aaron van Herk
The current Weave/AssetMaster integration supports a two way link between Weave and AssetMaster. That is AssetMaster can send the current set of assets to Weave for display and Weave can send the current set of assets for display in AssetMaster. Currently Internet Explorer is the only browser supported for this type of integration.
The implementation of the Weave - AssetMaster Application Integration Module provides the following functions.
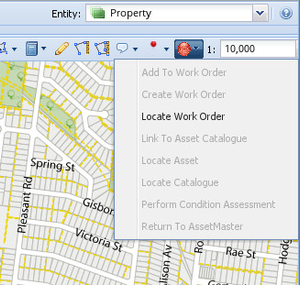
Link from Weave – AssetMaster
- Locate Asset
- Locate Catalogue
- Link to Asset Catalogue
- Create Work Order
- Add to Work Order
- Locate Work Order
- Perform Condition Assessment
- Return to AssetMaster
Link from AssetMaster – Weave
- Show GIS
- View Results in GIS
Upon clicking on the AssetMaster button option in Weave, the AssetMaster application will be brought forward with the selected procedure in AssetMaster and will be focused on the records corresponding to the features selected in Weave. From this point, the complete suite of AssetMaster operations is available to the user, including work order creation, reporting, etc. Please refer to AssetMaster's documentation for a full lst of features avaliable to the user.
Sending information from AssetMaster to Weave is undertaken using AssetMaster’s GIS button. Once a feature(s) is selected in the AssetMaster interface, the user has the ability to send the fetaures from AssestMaster to Weave. From this point, the user has access to all of the Weave functions, including searching and reporting. 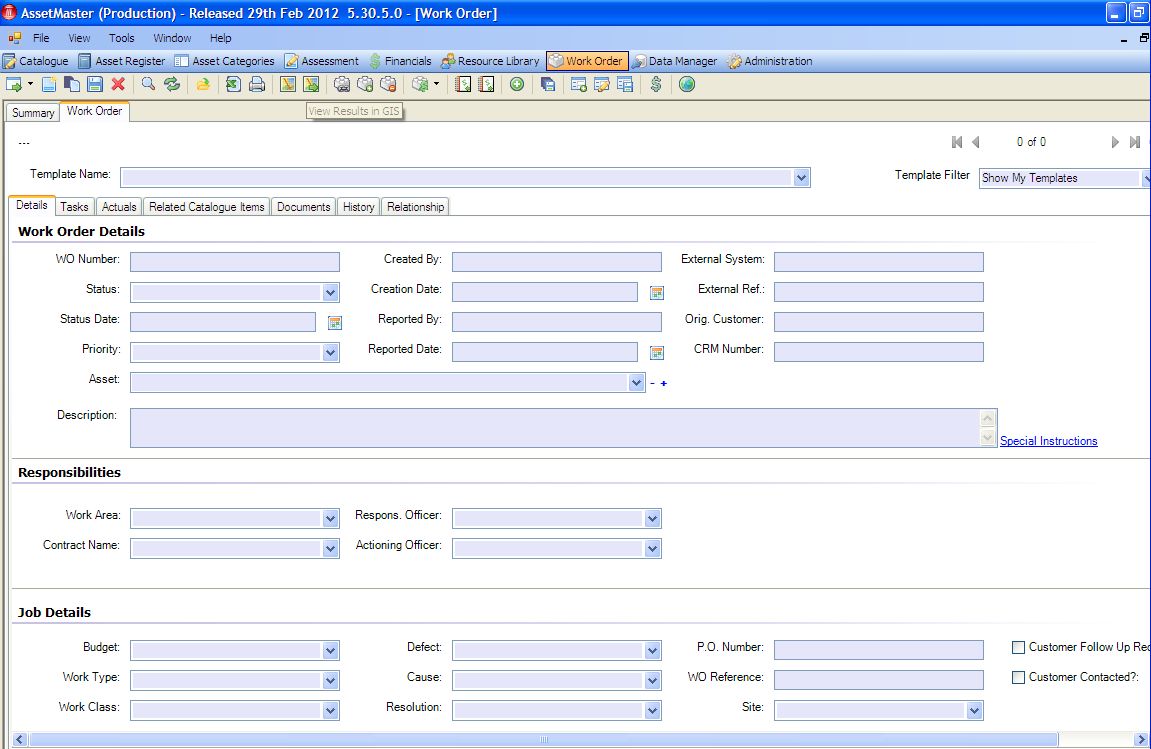
Setup
The setup of the Weave - AssetMaster Application Integration Module comprises two stages:
1. Weave Server Setup
Add the following to the client.xml file to provide a menu with the tools avaiable.
<item action="com.cohga.assetmaster.menu">
The AssetMaster Server side code.
The namespace used for AssetMaster is
xmlns:assetmaster="urn:com.cohga.assetmaster#1.0"
<assetmaster:config id="default">
	<assetmaster:dir>C:\Program Files\InfoMaster\AssetMaster_PROD\</assetmaster:dir>
	<assetmaster:exe>applauncher.exe</assetmaster:exe>
	<assetmaster:appname>iAssetMaster</assetmaster:appname>
	<assetmaster:port>9000</assetmaster:port>
	<assetmaster:server>localhost</assetmaster:server>
	<assetmaster:debug>true</assetmaster:debug>
	<assetmaster:seperator>_</assetmaster:seperator>
	<assetmaster:entity>lyr_assets</assetmaster:entity>
</assetmaster:config>
where
name |
value |
|---|---|
dir |
The location of the AssetMaster installation |
exe |
The execuatable used to send ids to |
port |
The port the application is listening on |
server |
The location of the server |
debug |
wheather to enable debugging on the AssetMaster side |
seperator |
When sending ids from Weave to AssetMaster the seperator used to distingish the ids |
entity |
The entity that will be used for asset information. |
2. Client PC Setup (setting up the user's computer)
The Weave AssetMaster DLL must be installed on each client PC as well as the Weave Link component
regsvr32 Weave.AssetMaster.dll
AssetMaster Setup and Configuration
The AssetMaster system requires the installation of the AssetMaster Client. Please refer to the Installation Guide documentation supplied with this product for the relevant information.